The Hexels 2.5 update we recently released adds animated layer properties such as transforms and post-effects. It also adds some new animation settings you can use to export smoother animations, including looping ones. I find the looping options in particular to be somewhat difficult to explain without the benefit of images, so I’m giving it a shot here with some GIFs to help.
Let’s get started. We’re going to make a bouncing ball.

Boring. Let’s throw a Blob post-effect onto it.

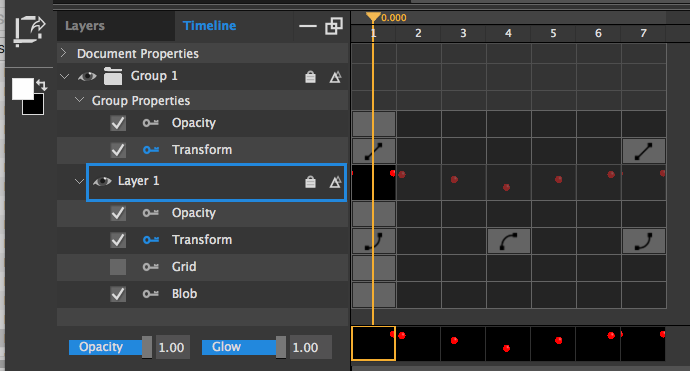
That’s better. Now let’s animate this ball as it bounces up and down. Switch to Timeline mode, add 6 frames, and expand the little arrow next to Layer 1. Make sure the key next to the Transform channel is enabled (blue) and use the Transform tool (T) to move the ball downward in frame 4 and back to its original position in frame 7.
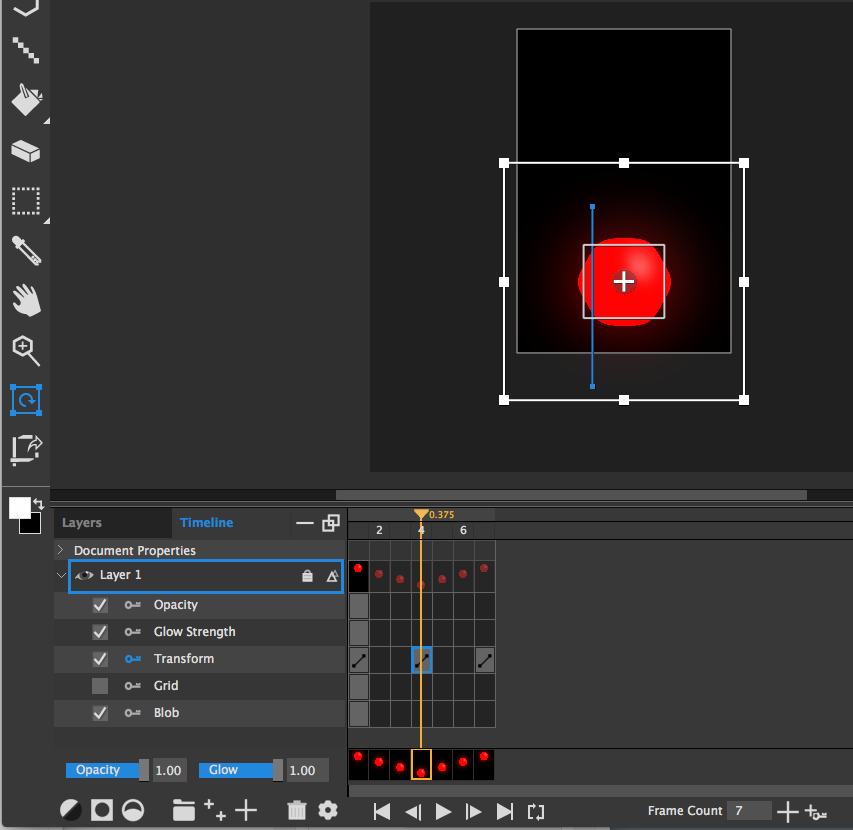
The ball now has three positions over seven frames, and the exported animation looks like this:
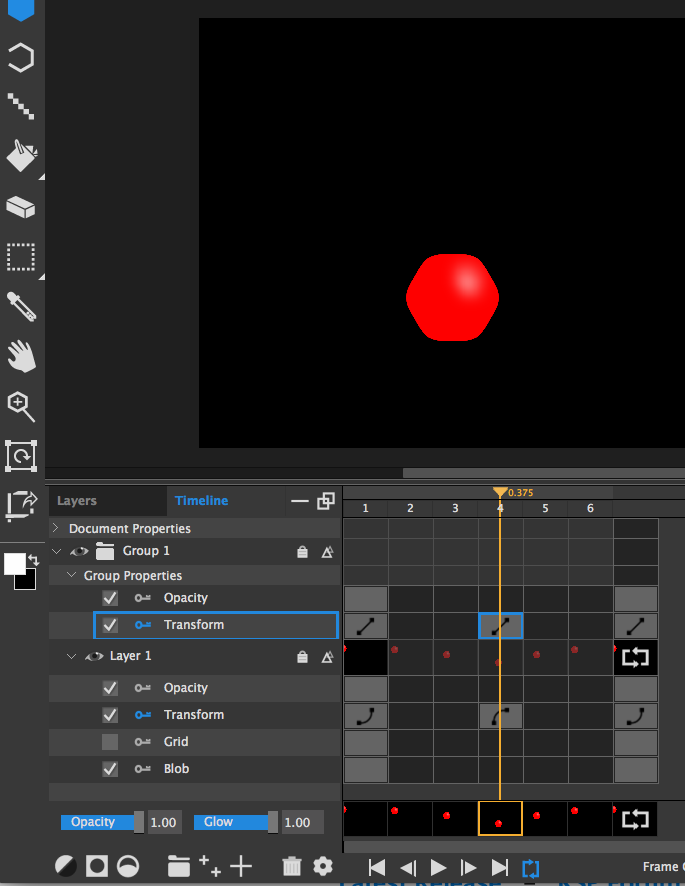
See the problem? Even though the ball returns to its initial position, it hangs in the air for one frame, motionless. We could fix this by removing the last frame (7) from the animation and manually positioning the ball in the new last frame (6), but we probably wouldn’t be able to get it quite right. (Unless we added a keyframe to the Transform track in frame 6 BEFORE we delete frame 7, but there’s a better way.) Go ahead and delete frame 7. Now, click on the little gear icon at the lower right part of the Timeline to open Animation Settings. Set Property Looping to “Loop To First”.
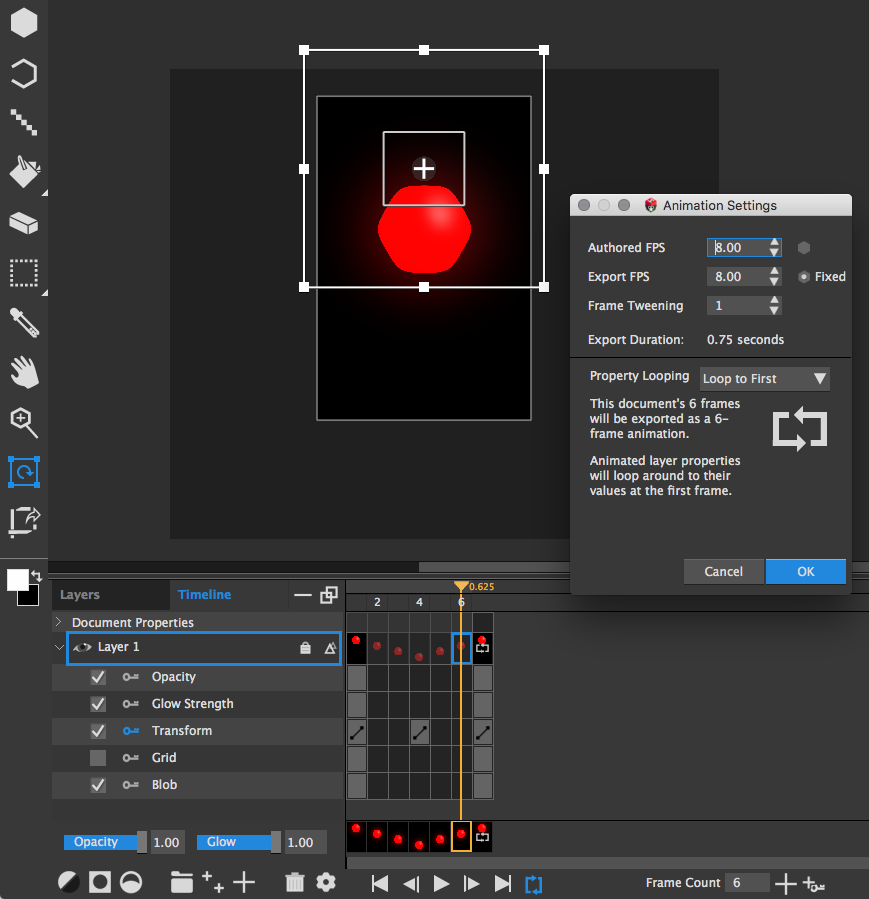
You’ll notice a new frame is now shown at the end of the timeline, but you can’t edit it. That’s because it’s essentially an alias or reference to frame 1. It’s there to show you that animated properties (such as layer transform) will use the values from frame 1 as a keyframe that lives just past the end of the animation. If you export now, you’ll see that your animation now has just 6 frames and loops smoothly:

Let’s make the animation a little more believable now by right-clicking the Transform keyframes at frame 1 and 4 and setting their tweening to ease-in and ease-out, respectively.
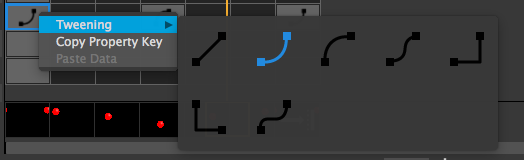
And here’s the result:

Much better. But what if we want our bouncing ball to move horizontally? Let’s start by putting this layer into a group. This lets us animate the horizontal motion with a separate tween type than vertical motion–gravity produces a parabolic trajectory, and our horizontal motion is linear.
Where do we put the Transform keyframe? With Loop-to-First enabled, we can’t edit our last frame without changing our first frame. Moving Group 1 halfway across the screen at frame 4 gives us a very awkward animation:
So how do we smoothly animate (and loop) the ball bouncing across the screen? Let’s start by adding a new frame (7) and setting the Transform of Layer 1 to be identical to that in frame 1. You can even hold alt and drag the Transform keyframe to copy it to frame 7. For Group 1, modify the transform so the ball is hanging halfway off the right edge of the canvas. Oh yeah and double click on Layer 1 to access its properties and set it to Tiled! Otherwise it won’t wrap around properly.
I’ll spare you the trouble of exporting it. If you export the animation and play it back, you’ll see the same problem we had with our very first export–it hangs for a frame as it loops because the first and last frame are identical. This is where the other type of property looping, “Approach Last”, is handy. Go back to Animation Settings and change Property Looping to Approach Last.

Export your animation now and you’ll get a nice loop with no weird hangs. It’s exactly like what would have happened if you hadn’t chosen any property looping options….except the very last frame isn’t included in the GIF.
It’s still a bit choppy though. What’s that, you say? You wish it could be smoothed out somehow, using magic or physics or geology? You’re in luck! Go back to Animation Settings and click the button to the right of Authored FPS to lock it, then increase Frame Tweening. From an editing standpoint, this won’t change anything, but when you export your animation, Hexels will insert tween frames in between each frame on your timeline. Now our animation loop looks even nicer.

That concludes this post. You can use these new animation settings to make all sorts of complex animations in Hexels, so have at it! And then post them or send them to us so we can ooh and ahh at them. Thanks for reading!